
How to Create a Meeting Room
Scheduling and setting up a video meeting, from who can get in to recording and invitations.
This guide walks the room setup form from top to bottom for a video meeting, where everyone can be on camera. Steps 1 through 10 follow the form in order, with best practices beside the steps they apply to. A checklist at the end covers what to confirm before the meeting starts.
Written for Enterprise accounts, which include every option shown here.
1. Sign In and Find Your Way Around
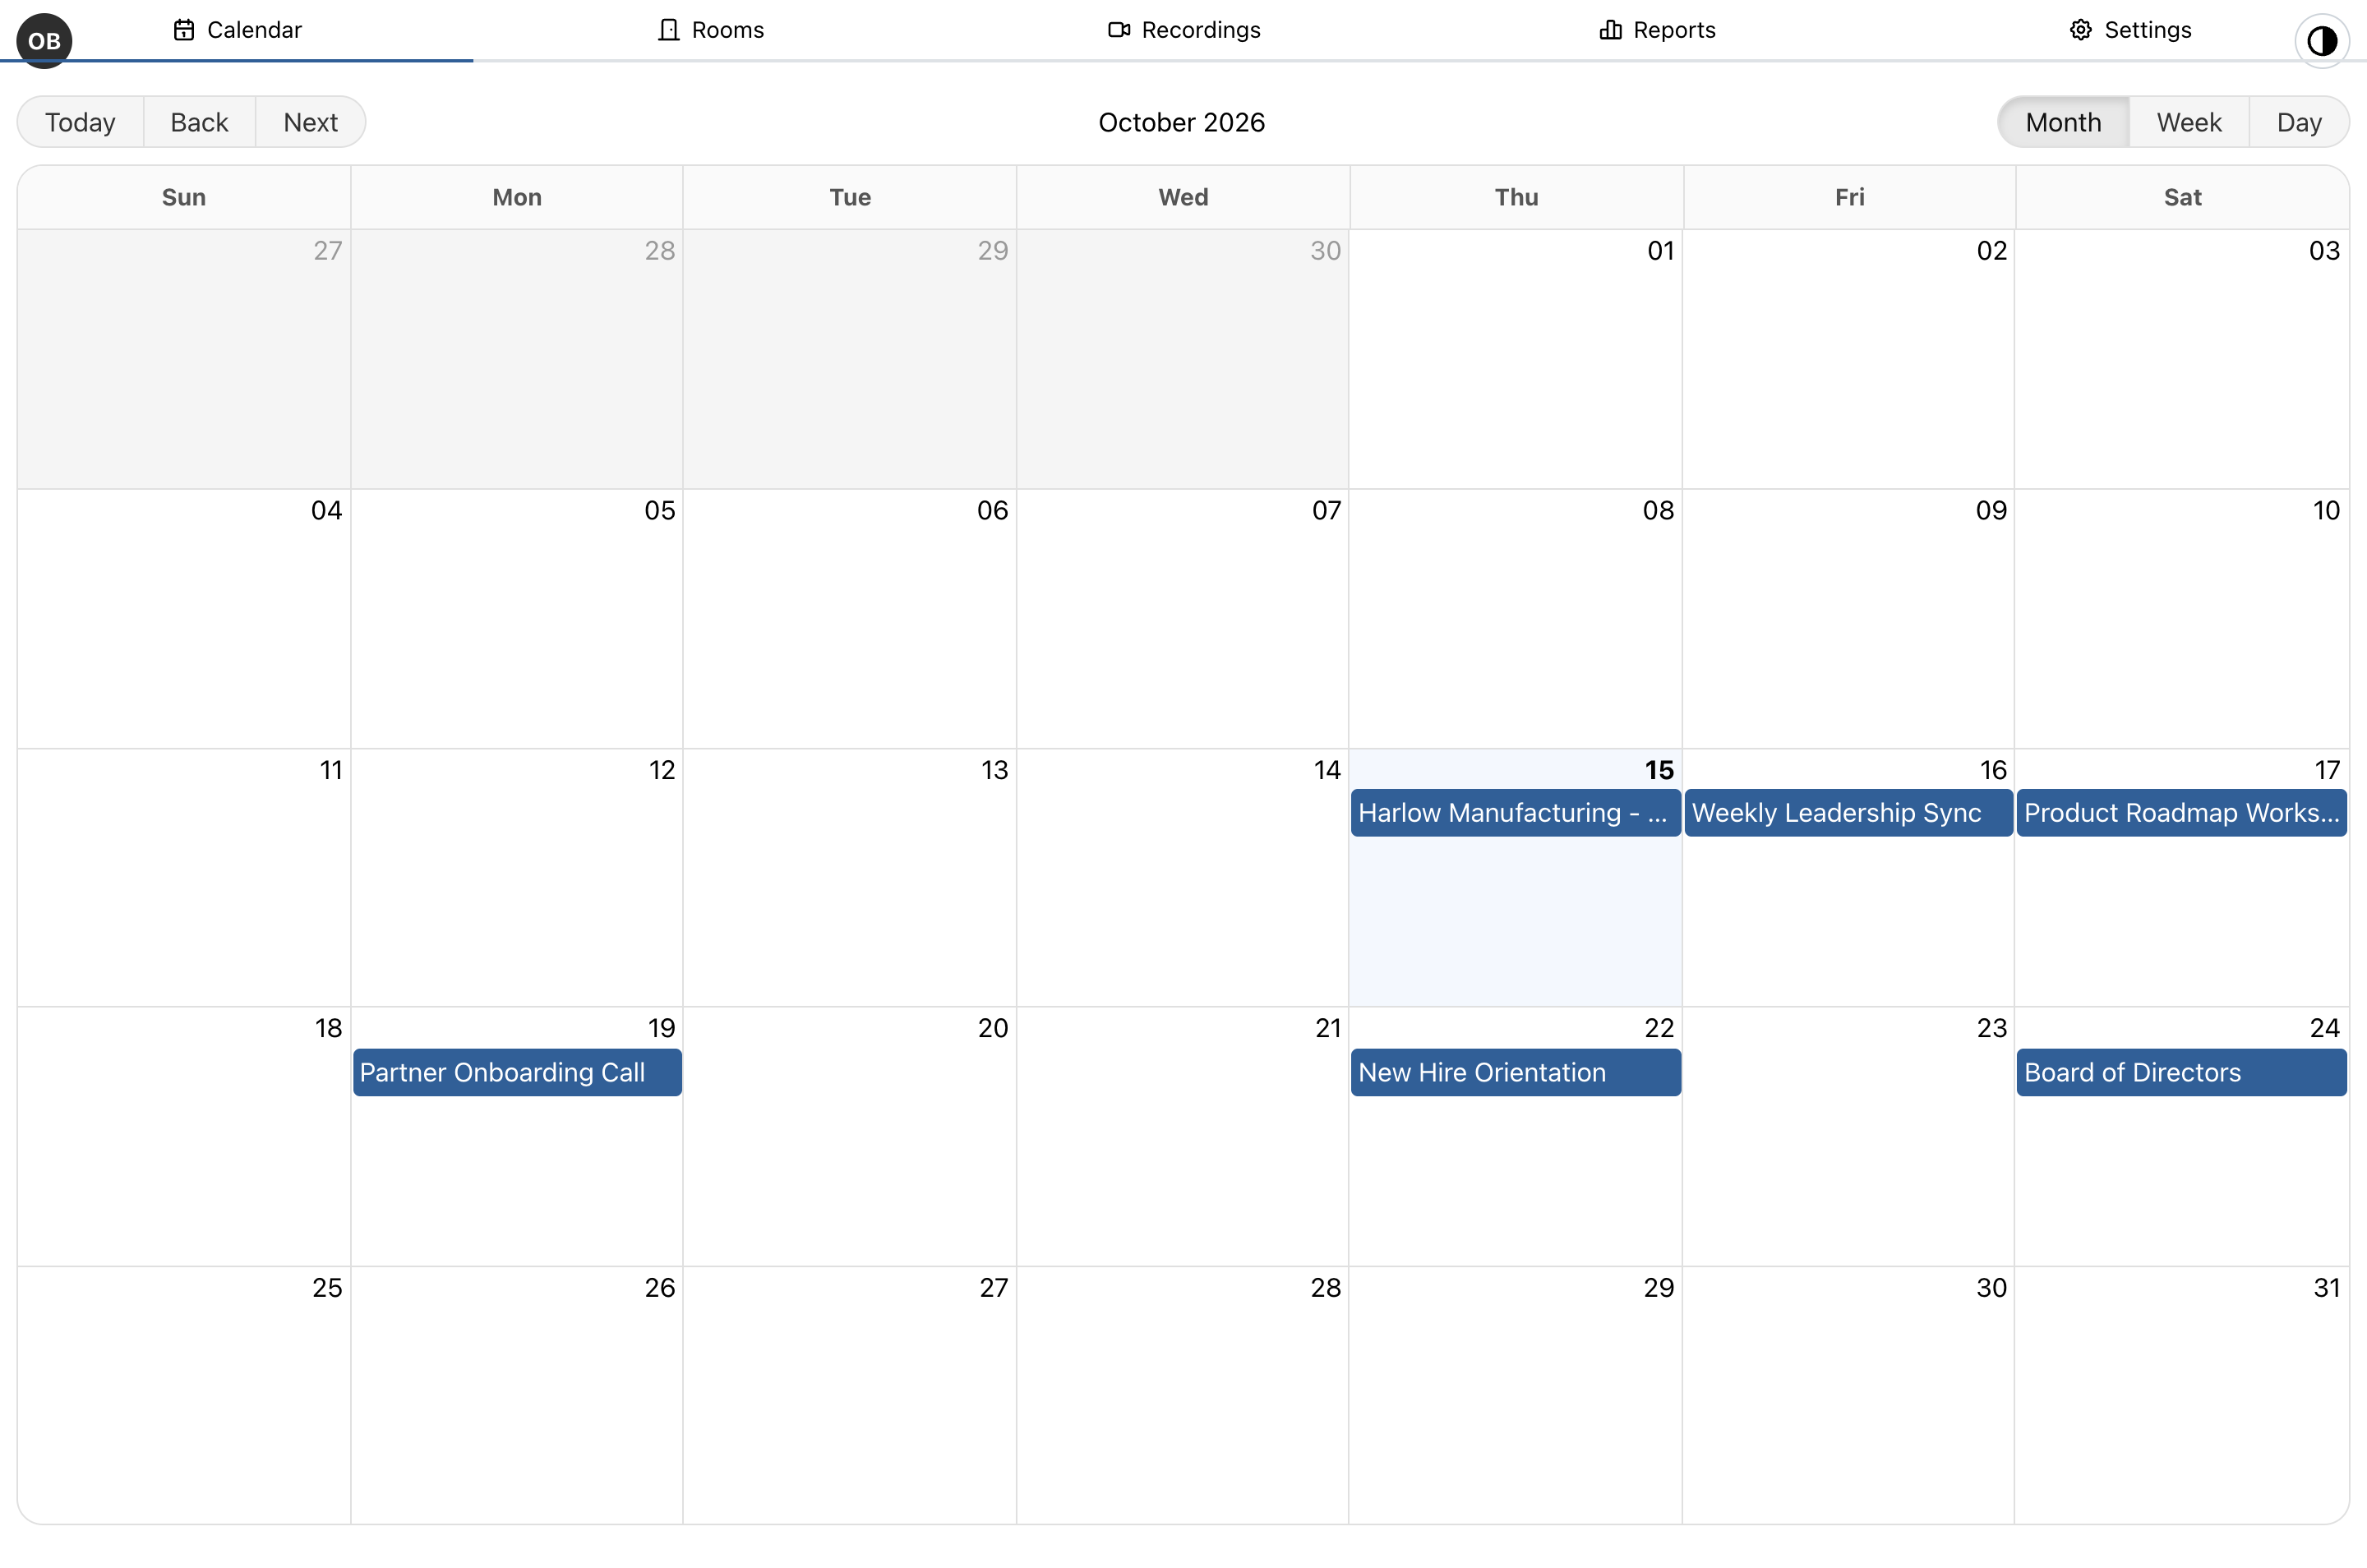
Sign in with your email address. You land on your calendar. The top navigation moves between Calendar, Rooms, Recordings, Reports, and Settings. The calendar switches between Month, Week, and Day.
2. Start a New Room
Double-click a date on the calendar to schedule a room for that day, or open the Rooms tab and click Create Room.
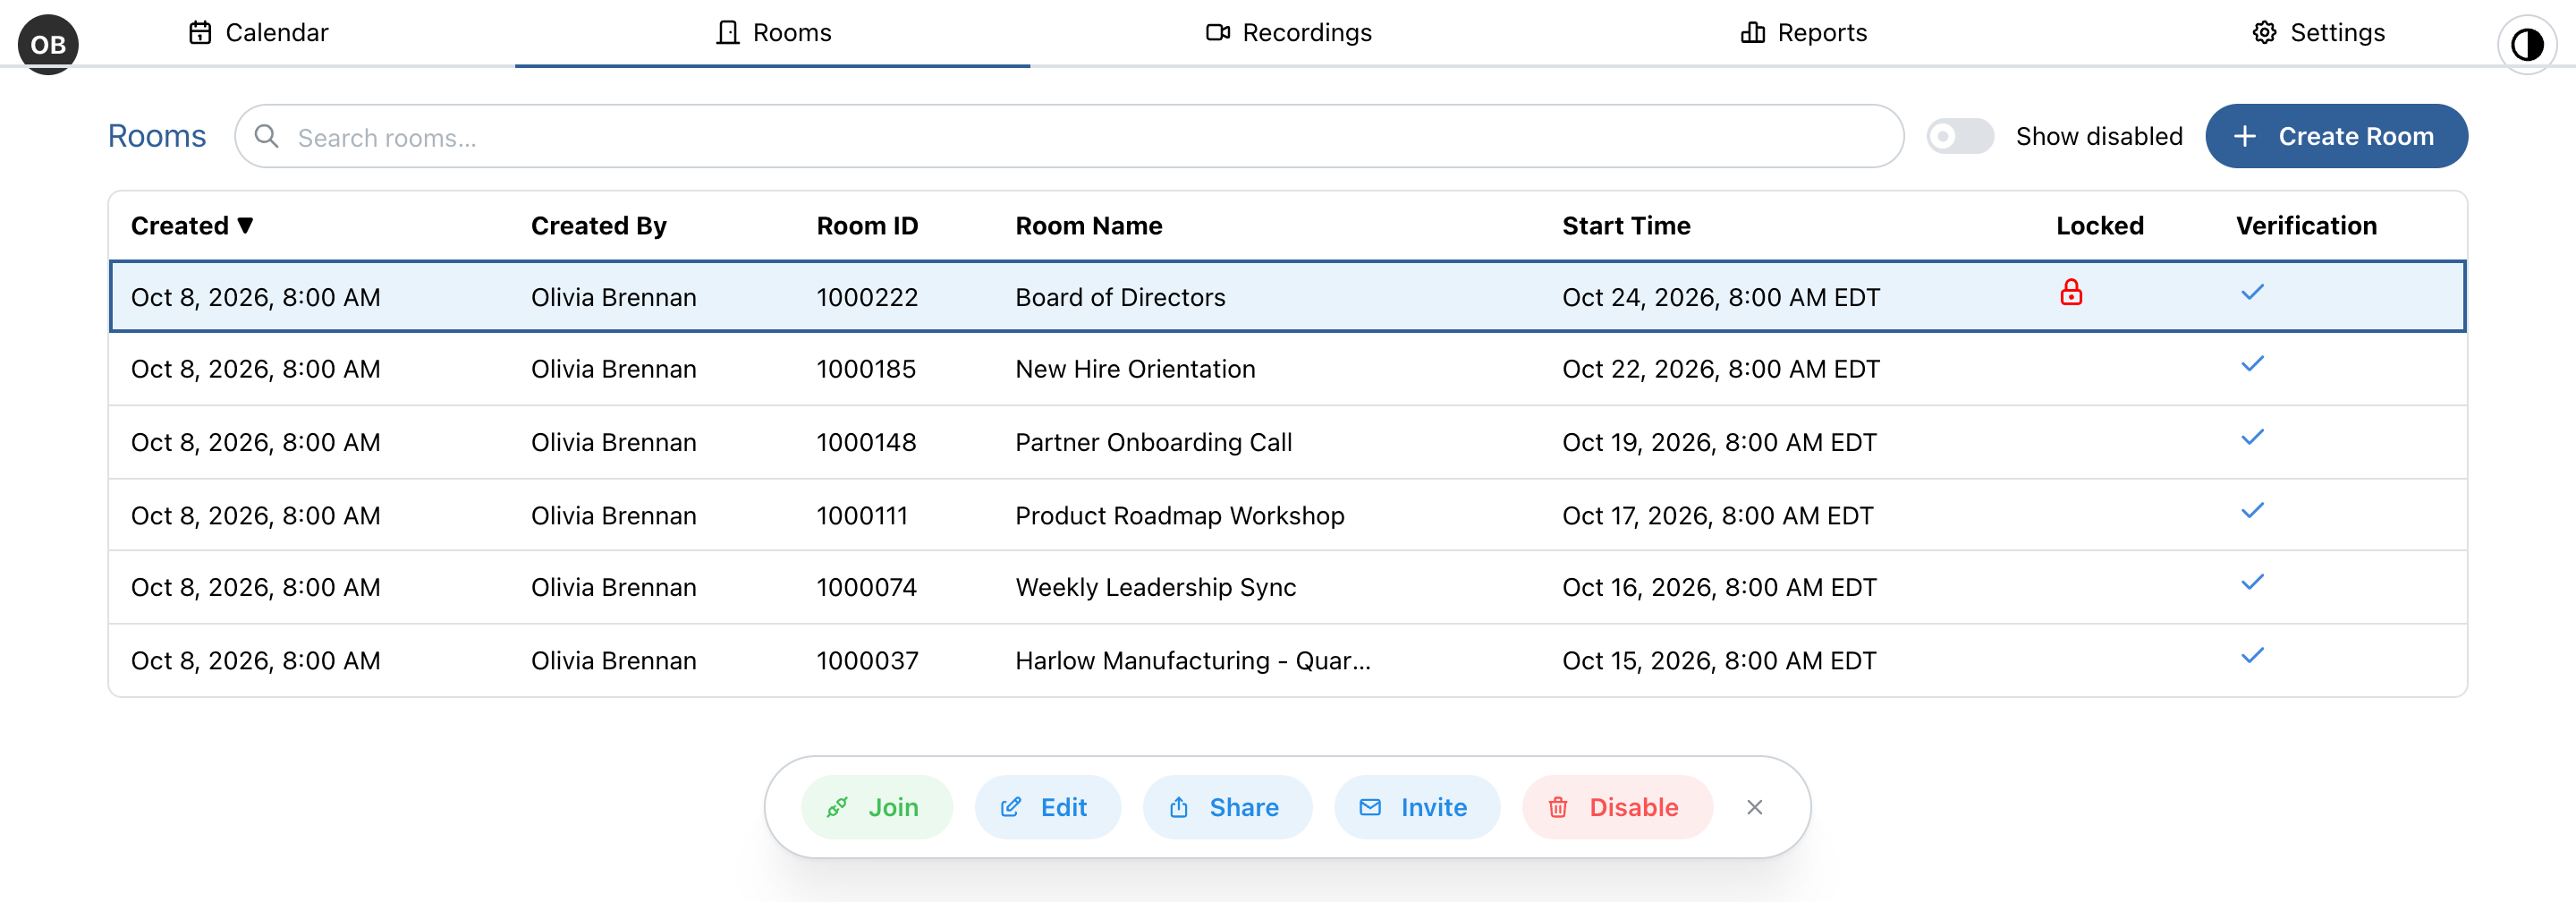
The Rooms list shows when each room was created and by whom, its Room ID, its start time, whether it is locked, and whether it checks attendees against an invite list. Select a room to Join, Edit, Share (copies the room's link), Invite, or Disable it.
Room setup is a single scrolling form. You can work through it in any order, and everything can be changed later with Edit.
3. Name the Room and Apply a Template
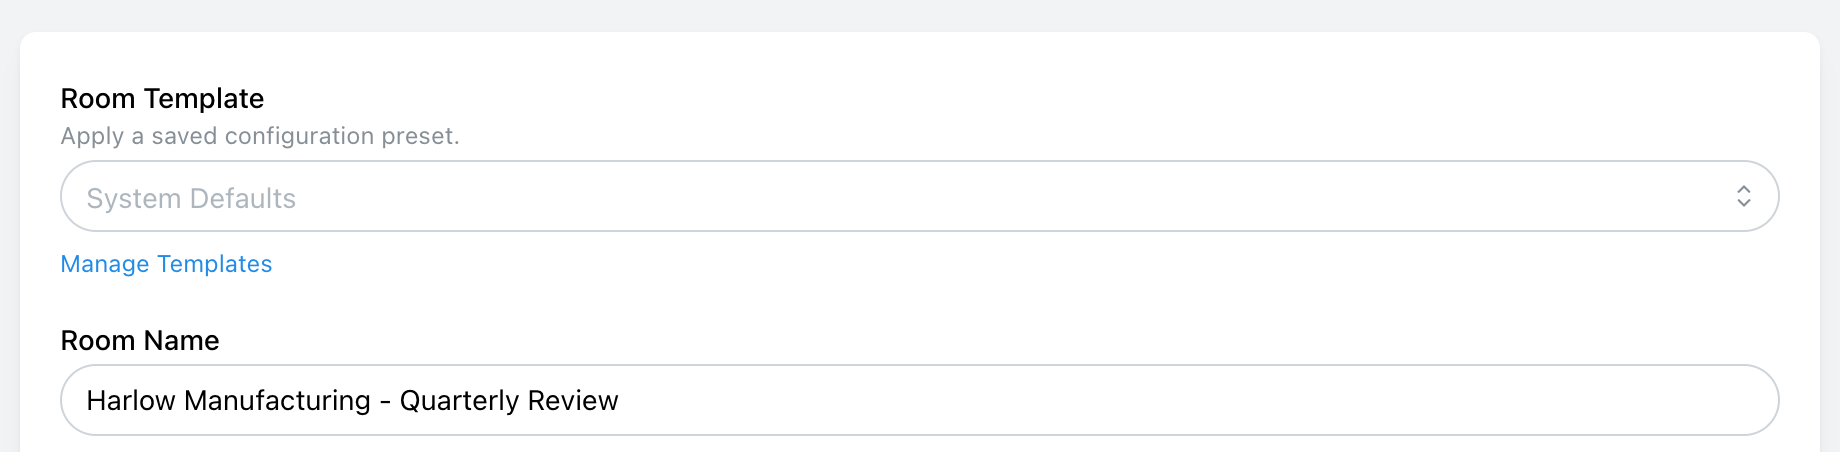
Enter a Room Name your team and your guests will recognize. It appears in the invitation and on the calendar.
Above the name, Room Template applies a saved set of settings. Templates are created in Settings, under Room Templates, and the Manage Templates link takes you there. If one template is set as your default, it is applied automatically whenever you open this form. Templates are offered only when creating a room, not when editing one.
4. Set the Schedule
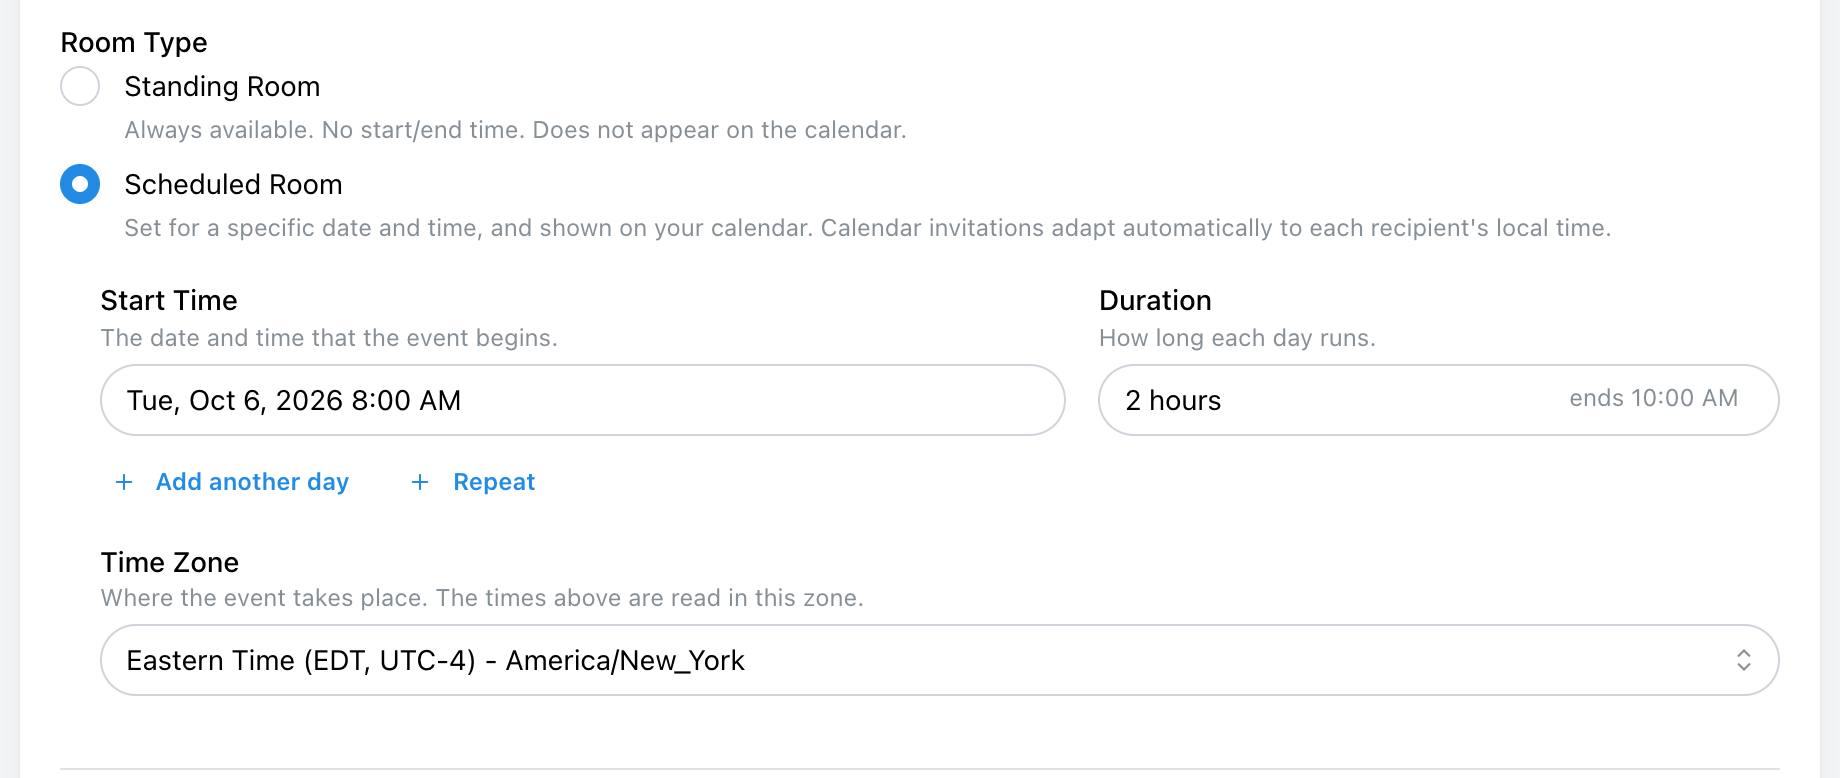
Choose a Room Type:
- Standing Room: always available, with no start or end time. It does not appear on the calendar.
- Scheduled Room: set for a specific date and time, and shown on your calendar. Calendar invitations adjust to each recipient's own time zone.
A scheduled room asks for a Start Time and a Duration, and shows the end time beside the duration. For a meeting that happens more than once, use the two buttons under the start time:
- + Add another day: pick extra dates by hand. They are listed under Also meets on, and moving the first day moves the rest with it.
- + Repeat: repeat weekly on the weekdays you choose, for the rest of this month, 3 months, 6 months, or 1 year.
Time Zone is where the meeting takes place, and the times above are read in it. When you edit a room later, changing the time zone keeps the time as displayed and moves the meeting by the difference between the zones, so check the start time afterwards and re-send the invitation.
5. Leave Webinar Mode Off and Set Room Access
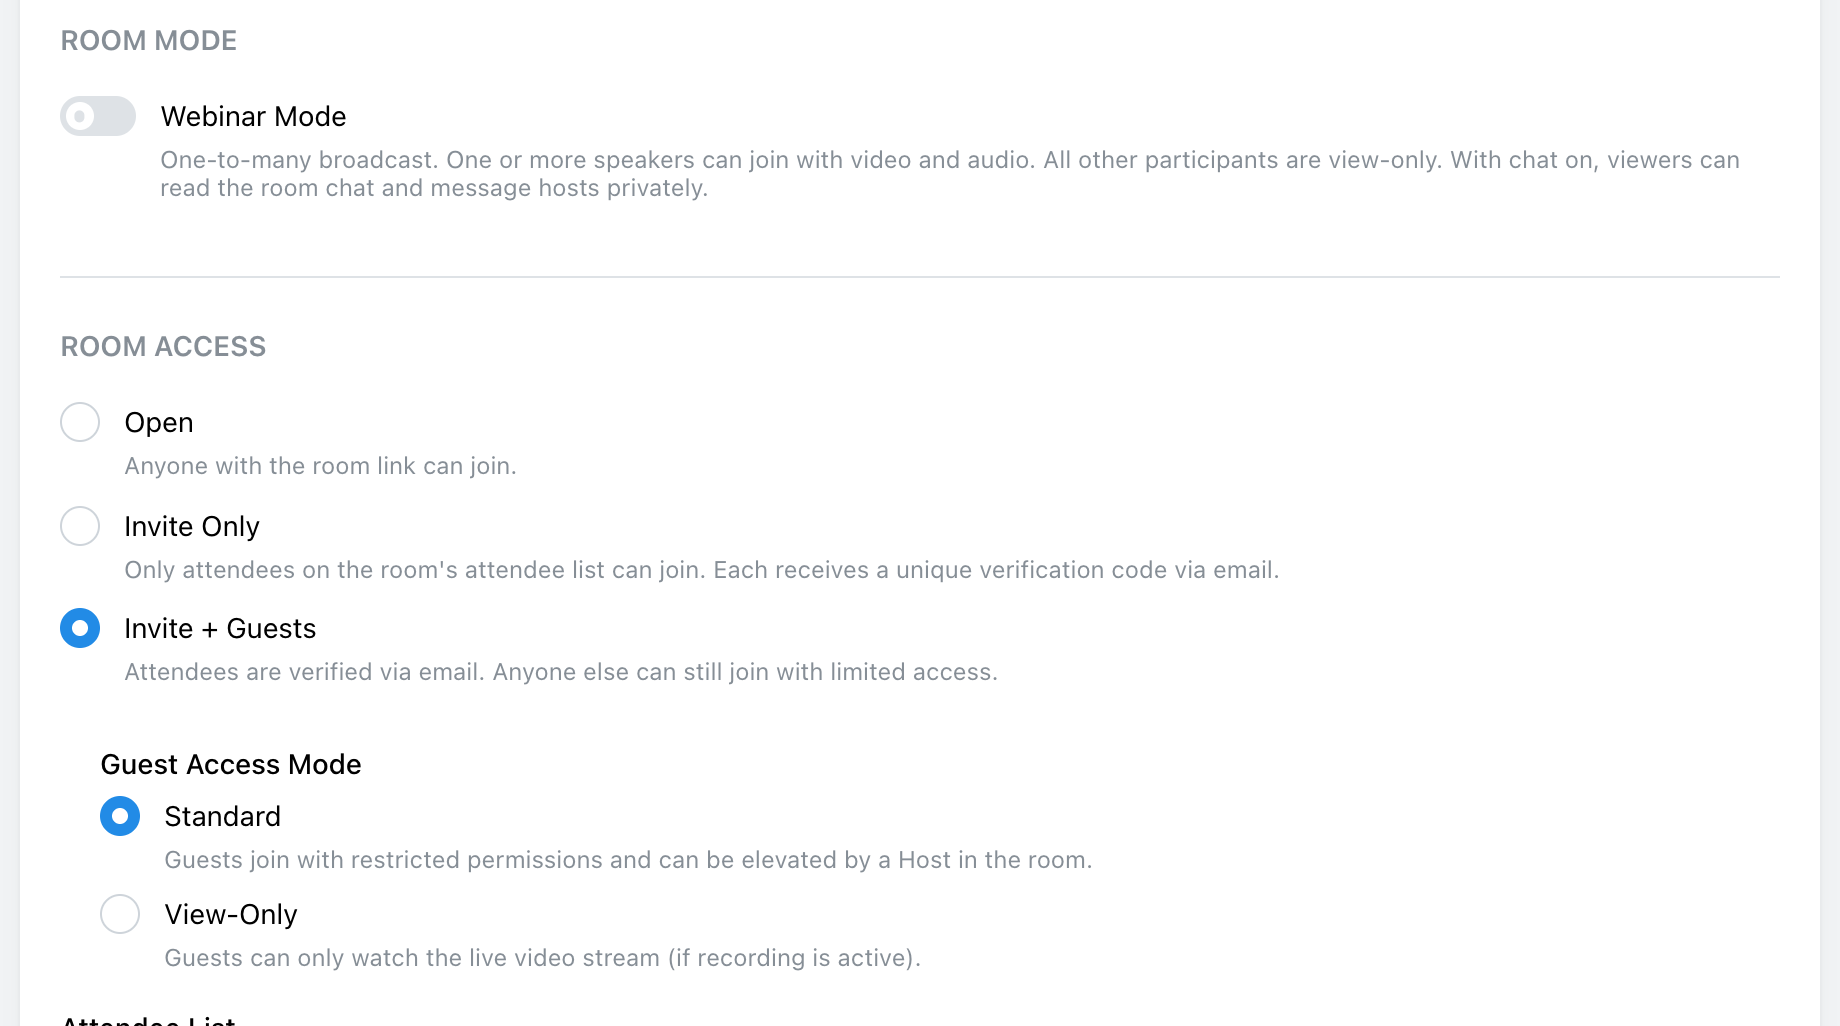
Room Mode holds one switch, Webinar Mode. Leave it off for a meeting. Webinar Mode turns the room into a one-to-many broadcast, where speakers are on camera and everyone else watches, and it changes several of the options further down the form. Webinars have their own guide: How to Create a Webinar Room.
Room Access decides who is allowed in:
- Open: anyone with the room link can join.
- Invite Only: only attendees on the room's attendee list can join. Each one confirms who they are with a code sent to their email address.
- Invite + Guests: attendees are verified by email, and anyone else can still join with limited access.
Under Invite + Guests, choose a Guest Access Mode:
- Standard: guests join with restricted permissions, and a host can give them more once they are in the room.
- View-Only: guests can only watch the live video stream.
6. Build the Attendee List
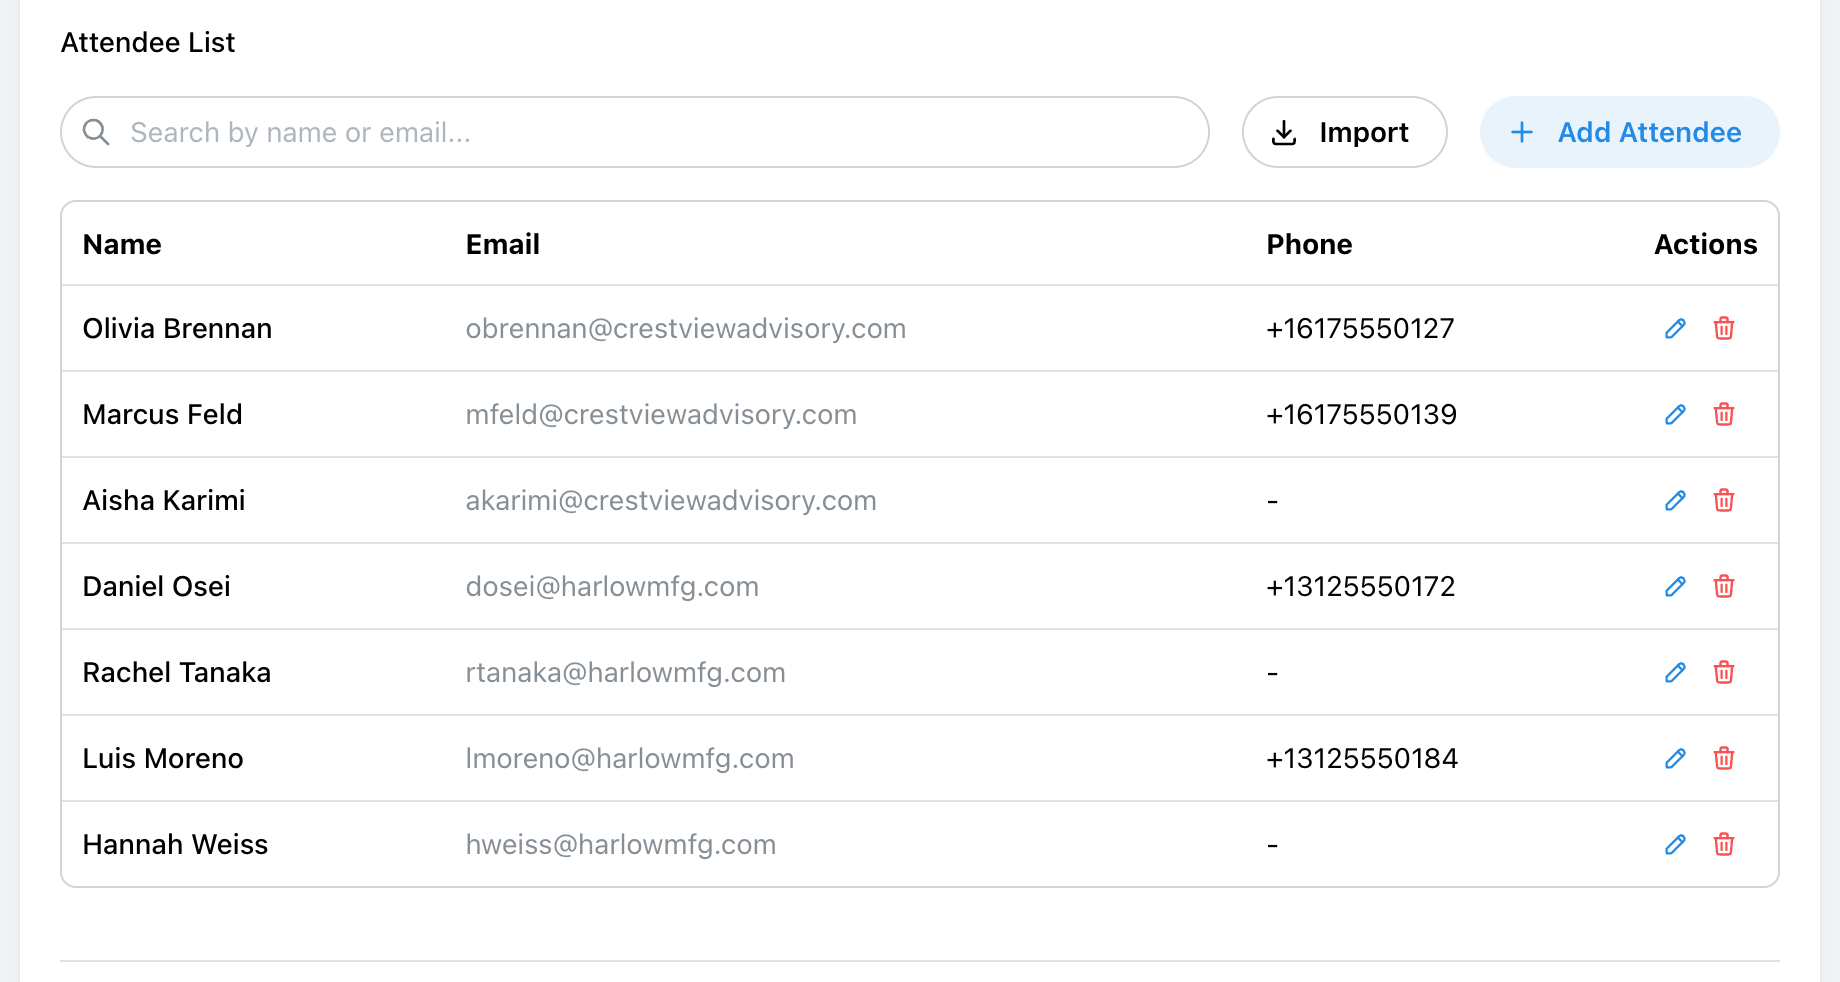
Choosing Invite Only or Invite + Guests shows the Attendee List. Add people one at a time with Add Attendee, or use Import to bring in the attendees of a previous room. Duplicate email addresses are merged automatically.
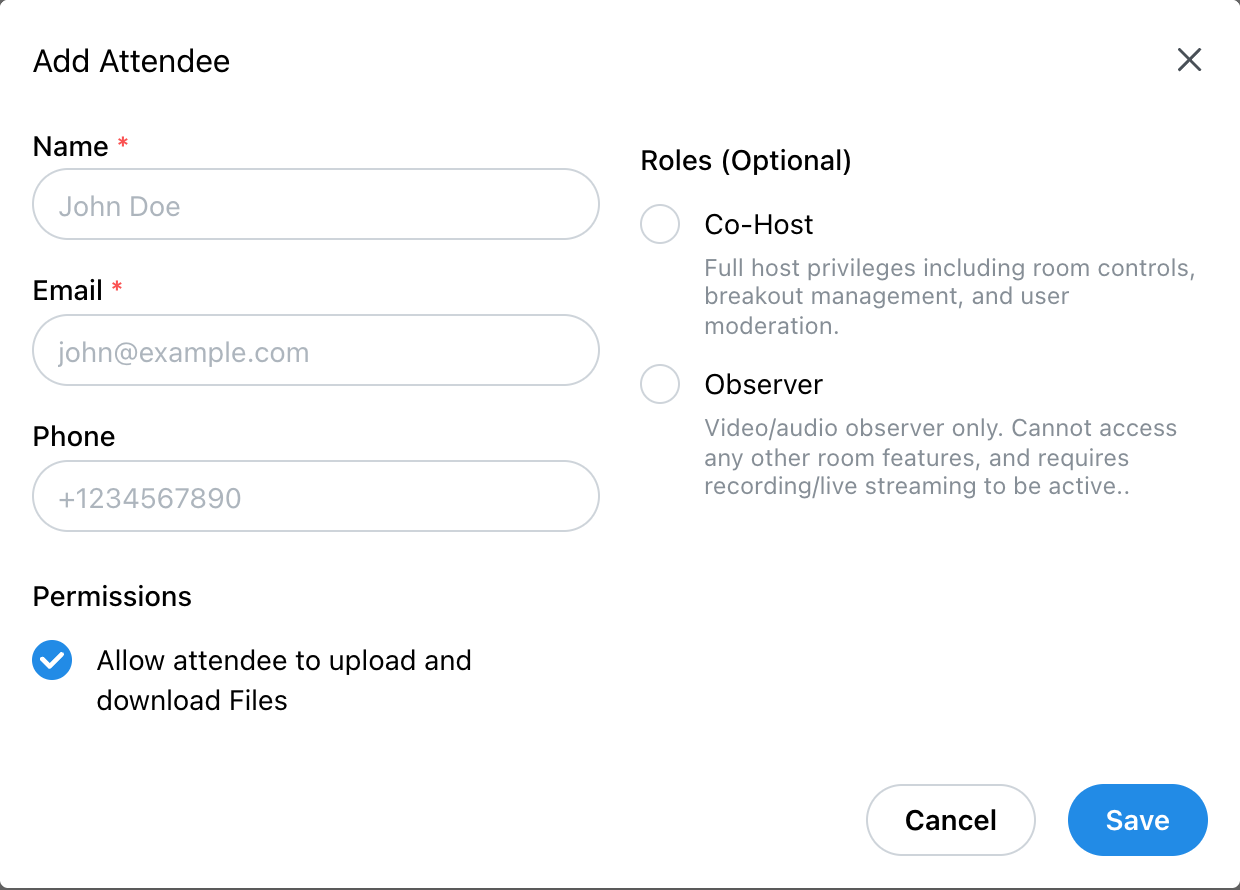
For each attendee, Name and Email are required. Phone is optional, and is what lets you send them an SMS invitation later. Under Permissions, you choose whether they can upload and download files in the room.
Two optional roles change what an attendee can do:
- Co-Host: full host privileges, including room controls, breakout rooms, and managing other attendees.
- Observer: watches the meeting and nothing else. No other room features, and the meeting must be recorded or streamed for them to see it.
7. Choose the Room Features
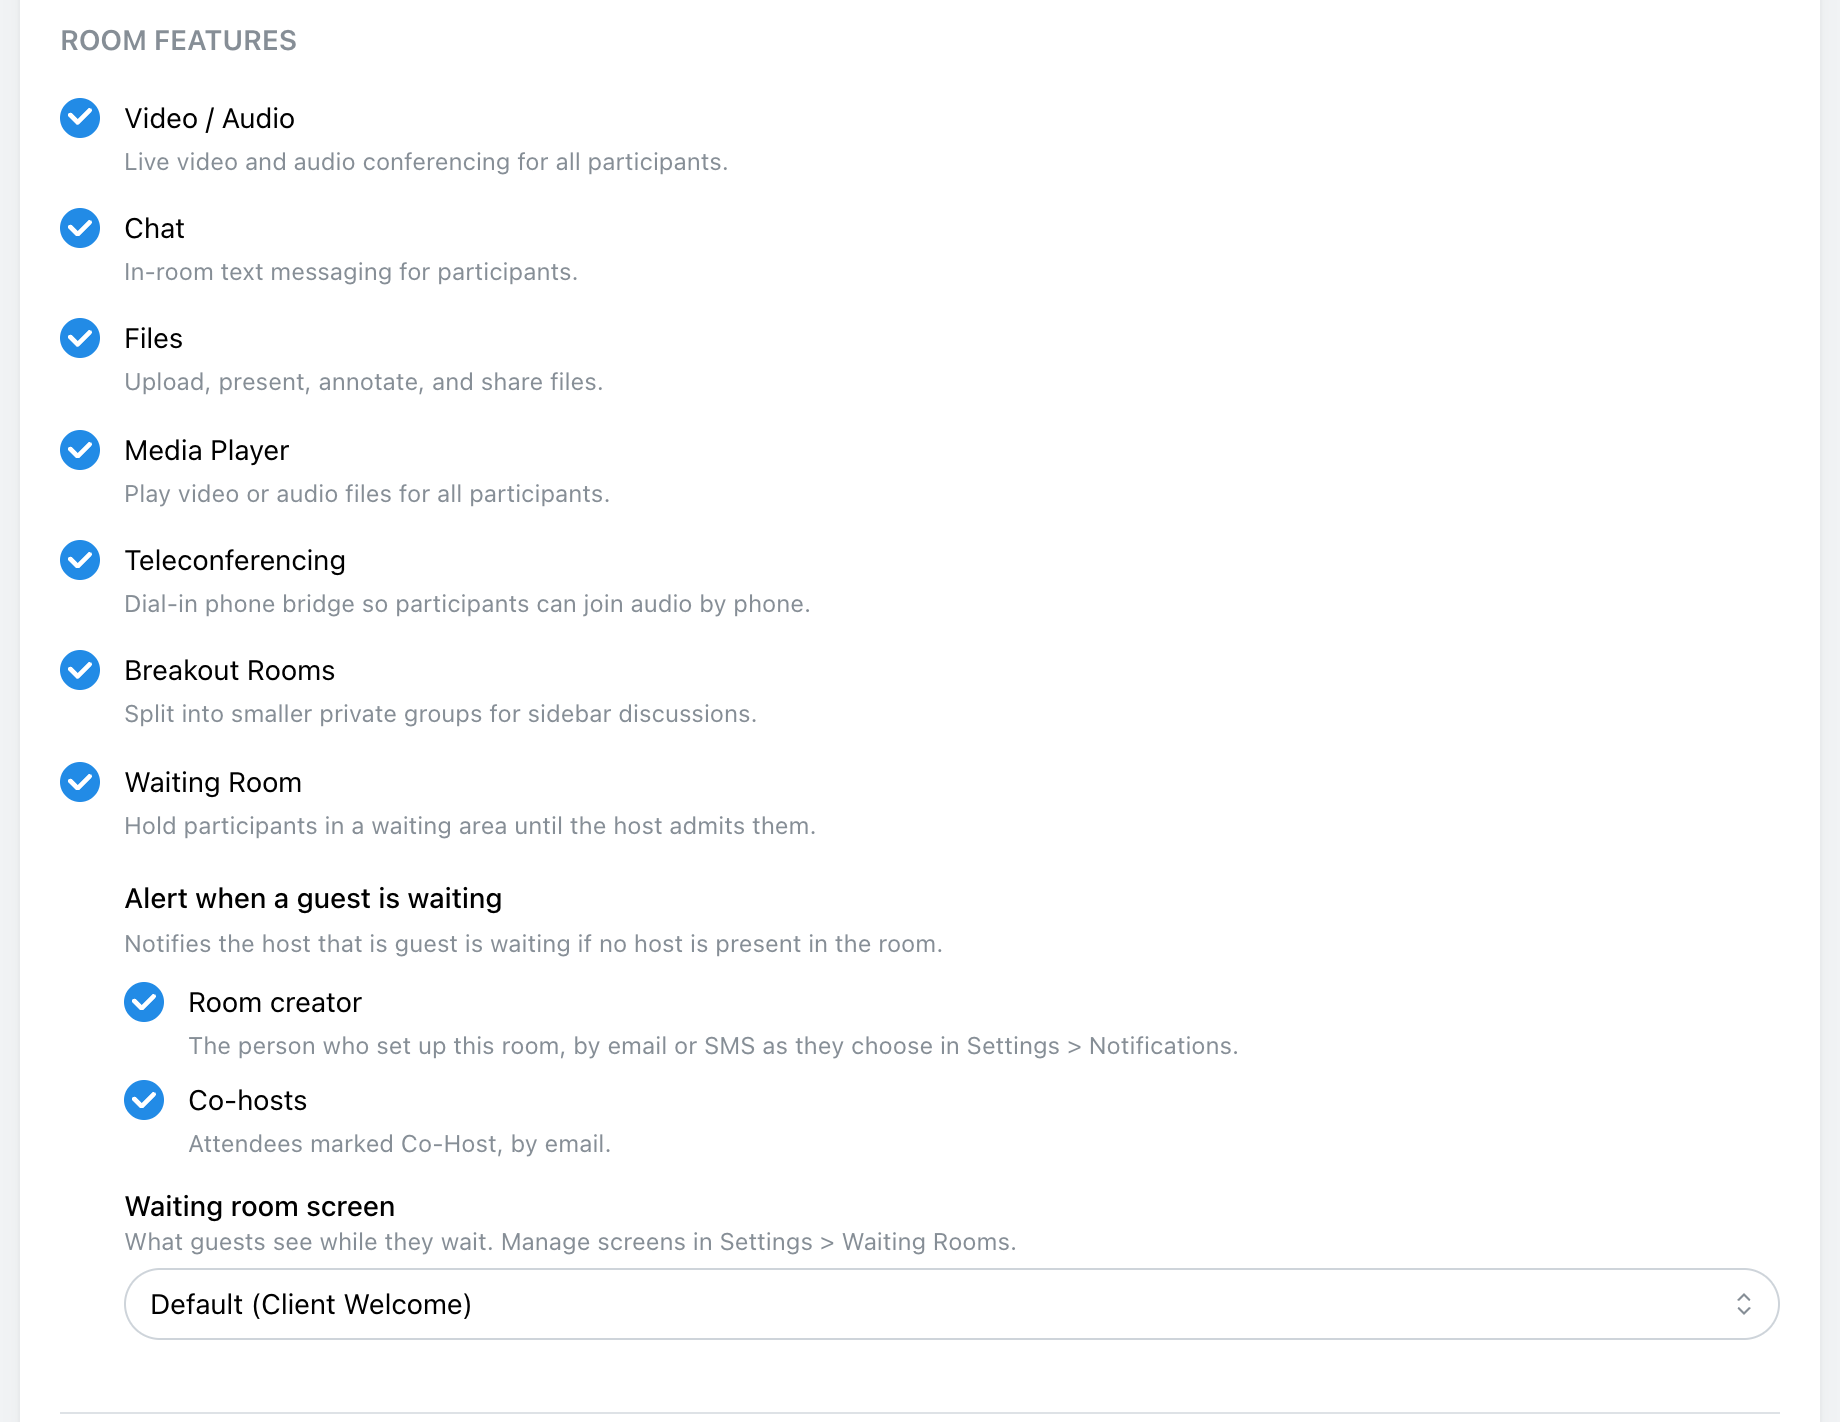
Under Room Features, turn on what this meeting needs:
- Video / Audio: live video and audio for everyone.
- Chat: text messages in the room.
- Files: upload, present, annotate, and share files.
- Media Player: play a video or audio file for everyone.
- Teleconferencing: a dial-in phone line, so people can join the audio by phone. The room is given its Conference ID when you save it, and the invitations include the dial-in number and Conference ID automatically.
- Breakout Rooms: split into smaller private groups.
- Waiting Room: hold people in a waiting area until a host admits them.
With the waiting room on, two more settings appear:
- Alert when a guest is waiting: if someone has been waiting for about a minute with no host in the room, MegaMeeting alerts whoever you tick: the Room creator (by email or SMS, as they choose in Settings, under Notifications), the Co-hosts (by email), or both.
- Waiting room screen: what guests see while they wait. Your default screen is used unless you pick another. Screens are created in Settings, Waiting Rooms; Standard is the built-in one.
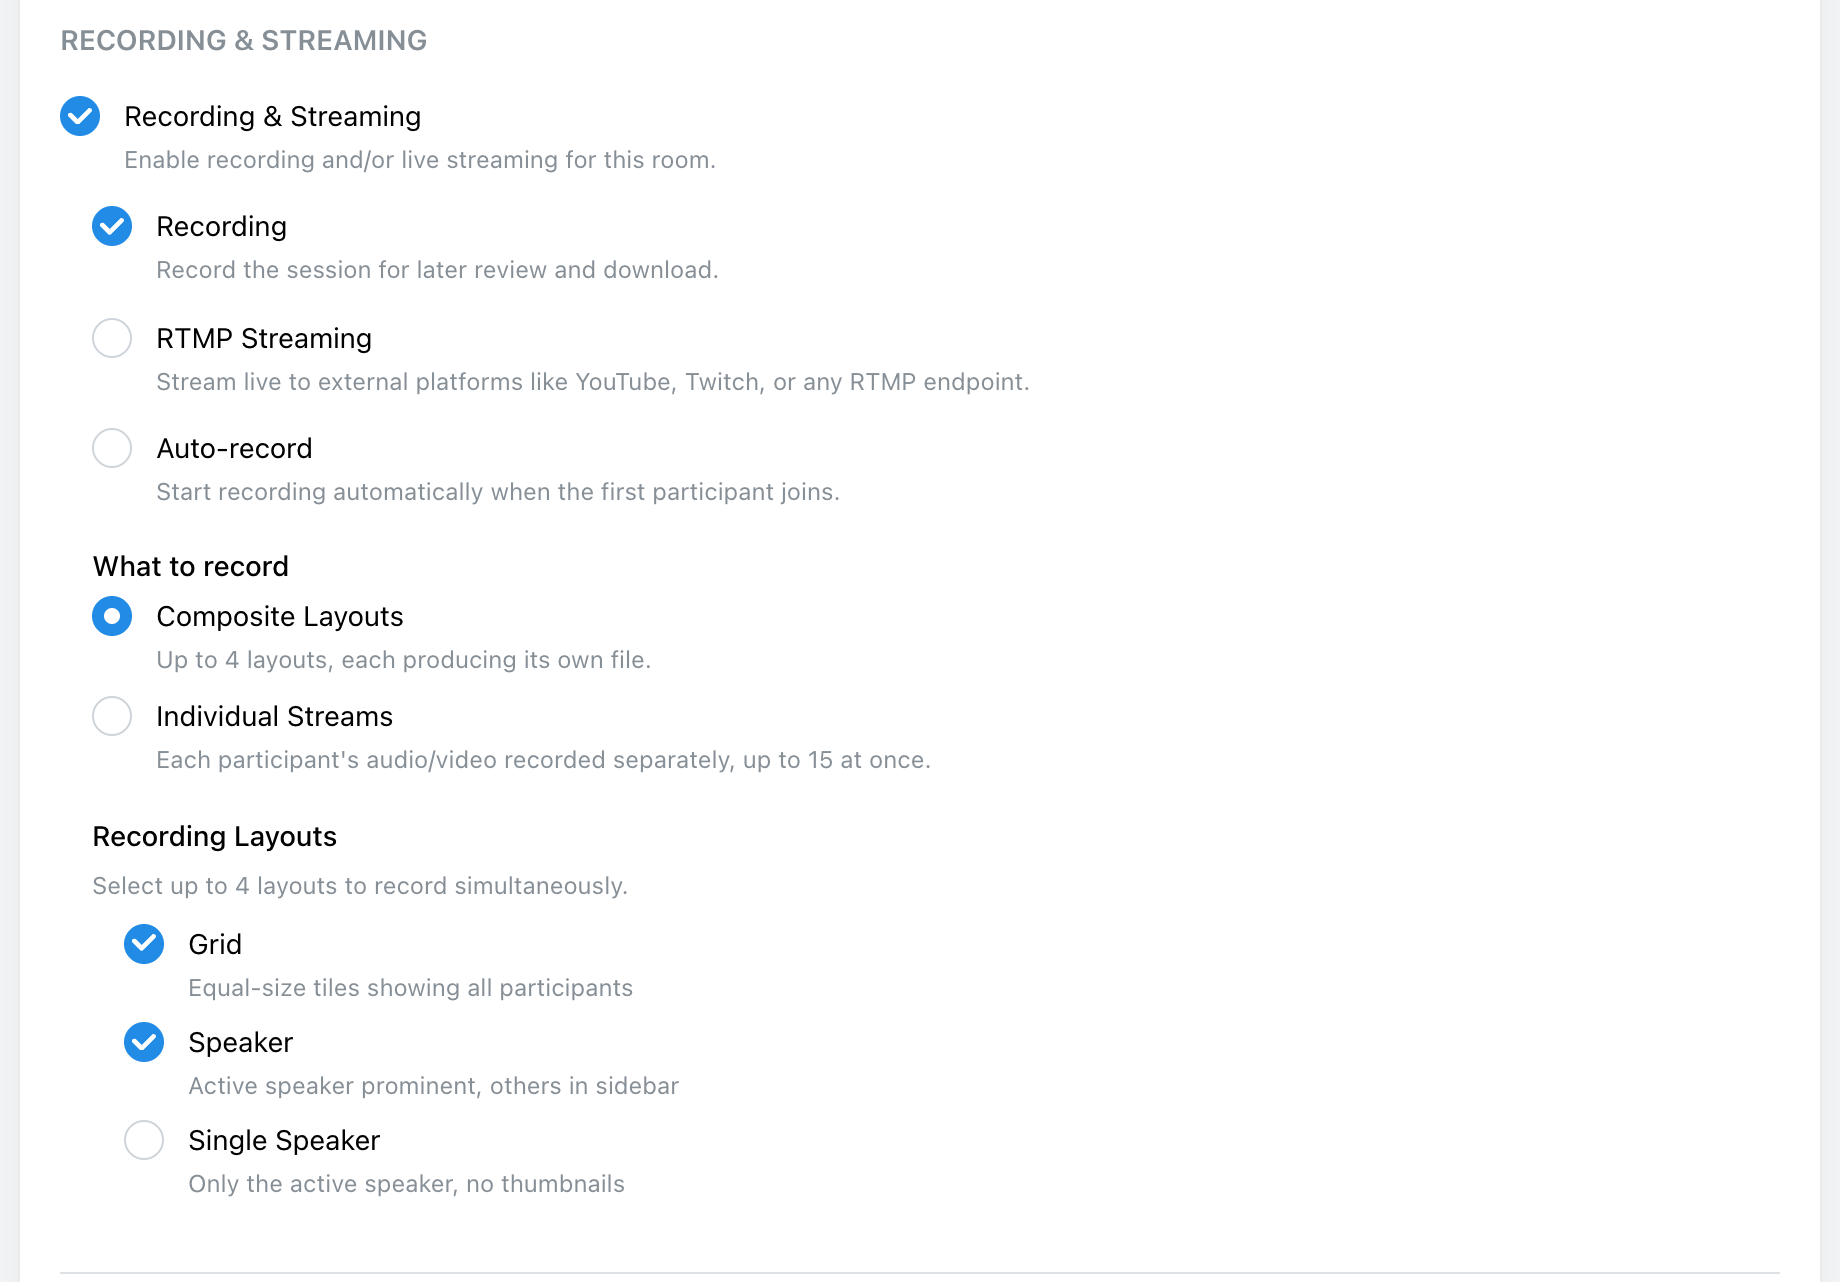
8. Recording and Streaming
Tick Recording & Streaming, then choose one or both:
- Recording: record the meeting to review and download afterwards.
- RTMP Streaming: stream the meeting live to YouTube, Twitch, or any other RTMP destination. Add each destination under RTMP URLs, pressing Enter after each one.
The automatic start follows what you chose: Auto-record for recording, Auto-stream for streaming, or Auto-Start for both. Each one starts when the first participant joins. Automatic streaming needs at least one RTMP URL.
What to record is one of two modes:
- Composite Layouts: the layouts you choose, recorded at the same time, each saved as its own file.
- Individual Streams: each participant's audio and video saved separately, up to 15 at once.
The composite layouts are:
- Grid: equal-size tiles showing everyone.
- Speaker: the person talking, large, with everyone else alongside.
- Single Speaker: only the person talking.
9. Session Settings, Then Create
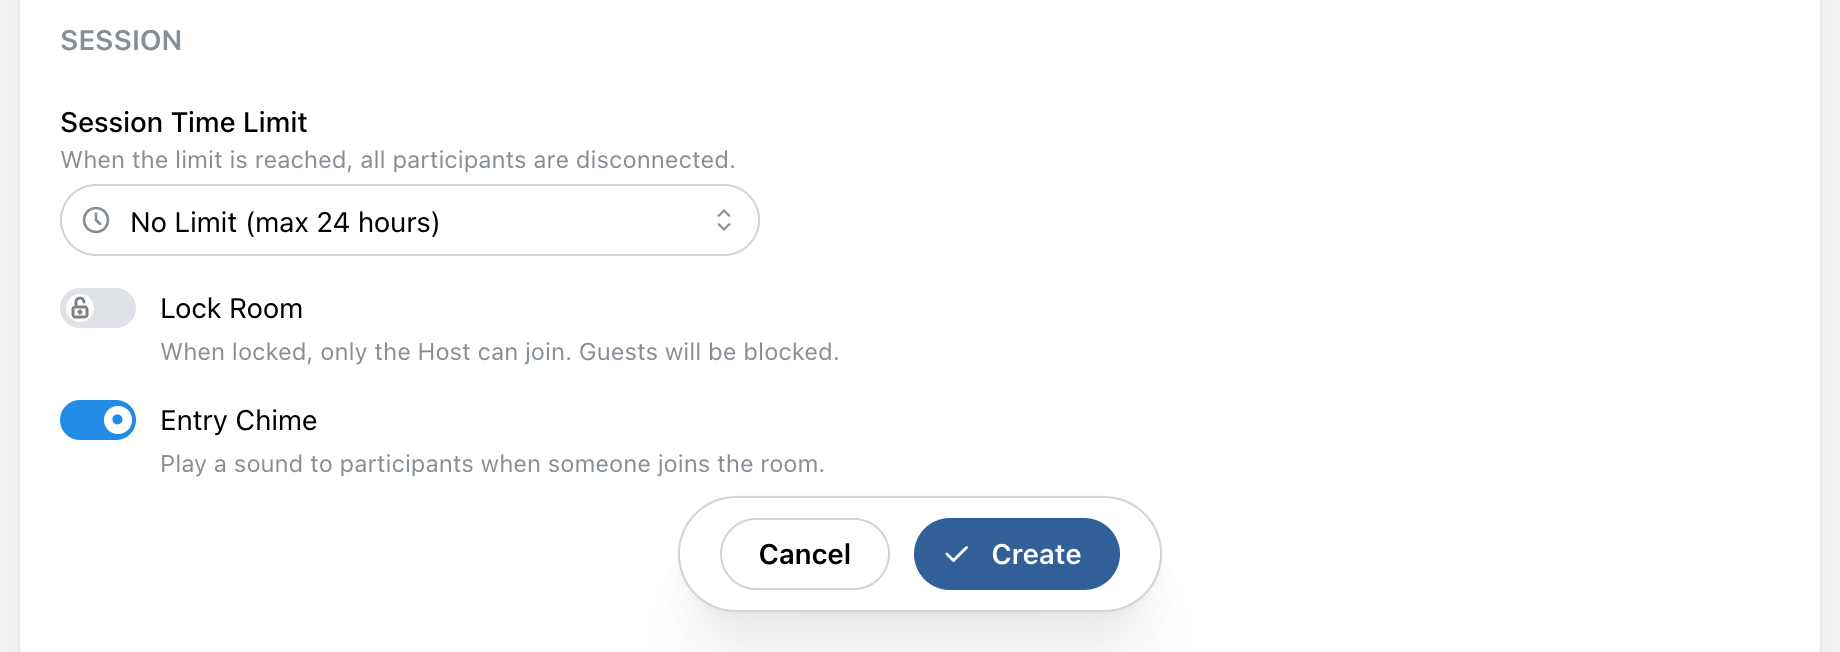
At the bottom of the form, Session holds the room's live controls:
- Session Time Limit: everyone is disconnected when the limit is reached. No Limit allows up to 24 hours.
- Lock Room: only a host can join; everyone else is blocked.
- Entry Chime: plays a sound when someone joins.
Click Create. Everything here can be changed afterwards with Edit.
10. Send Invitations
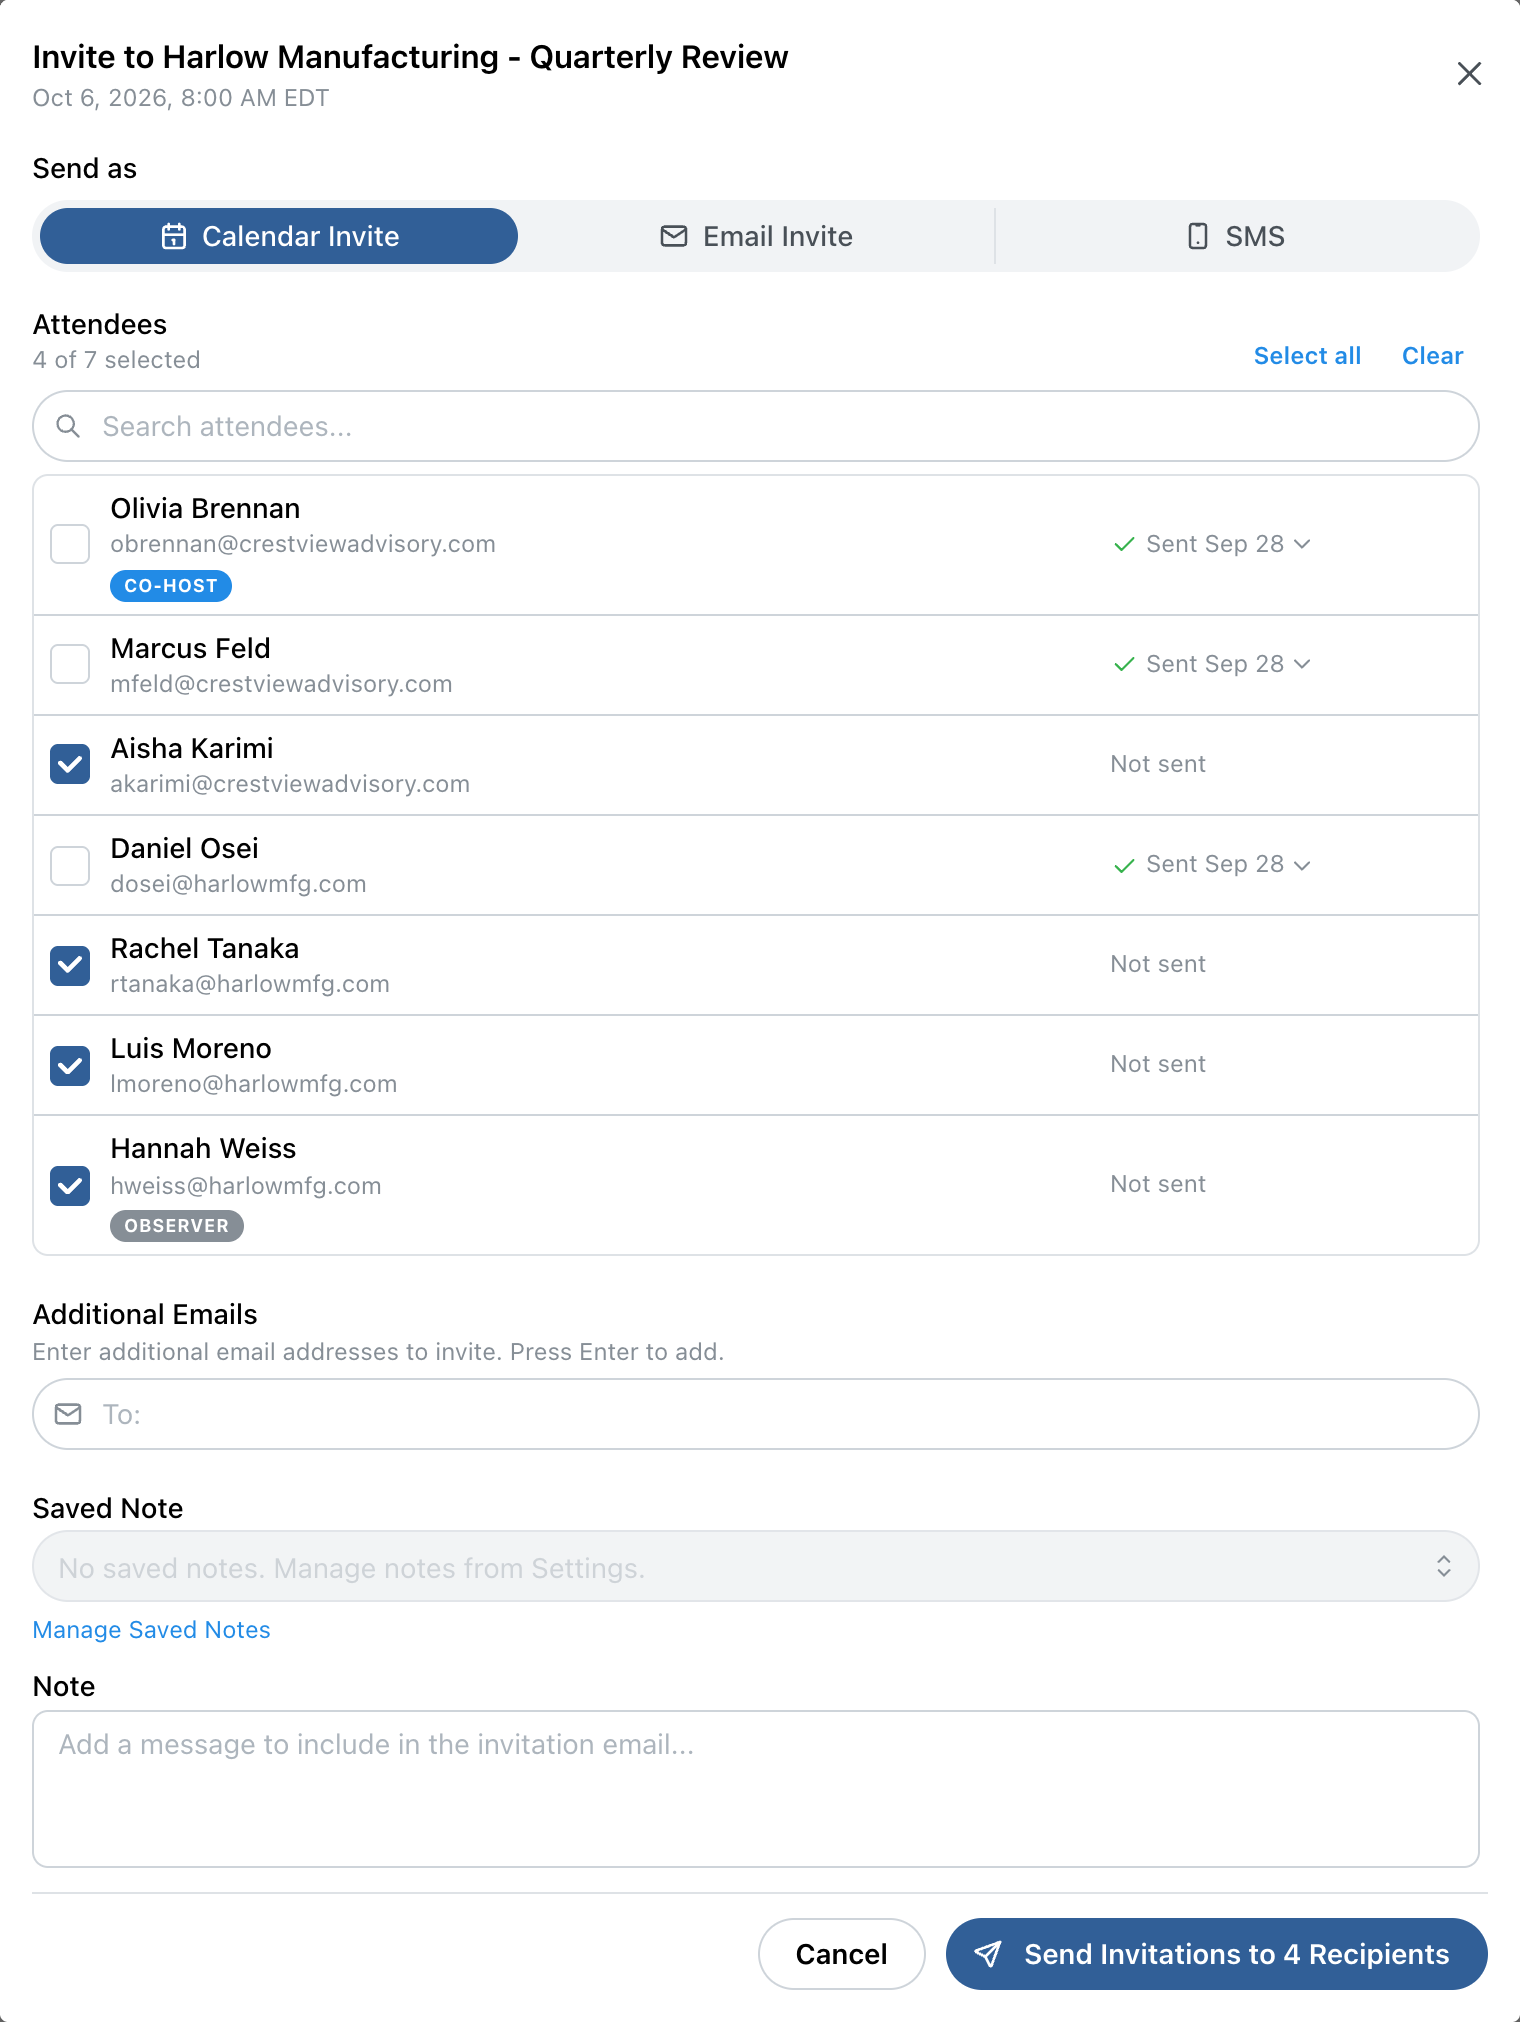
Right after you create a scheduled room, or one with an attendee list, MegaMeeting asks whether you want to invite attendees now. Choose Manage Invitations, or Later and come back any time: select the room in the Rooms list and click Invite.
- Under Send as, pick a Calendar Invite, which lands directly on the attendee's calendar, an Email Invite, or SMS.
- Each attendee's row shows whether that kind of invitation has already gone to them, and when. Anyone not yet sent one is selected for you, and anyone already sent one is not, so a second send is always deliberate. SMS starts with nobody selected.
- Use Additional Emails, or the phone field under SMS, for people who are not on the attendee list.
- Add a Note to go with the invitation. Saved Note fills it from the notes your account keeps (Settings, Invitation Notes), and your default note is already in the box.
For an Open room, you can also just send the link: select the room and click Share to copy it.
Before the Meeting
- Is Webinar Mode off?
- Does Room Access match who should get in?
- Does every attendee on the list have their own correct email address?
- Is there a co-host who can admit people and run the recording if you are late?
- Will someone start the recording, or is automatic recording on?
- If Observers or View-Only guests are coming, is automatic recording on?
- Is the time zone right, and does the start time still read correctly?
- Is the session time limit longer than the meeting could run?
- Has the invitation gone out, and been re-sent after any change of time?
Explore MegaMeeting