
How to Find and Share Recordings
Finding a recording, combining its parts, and sharing or downloading it.
Every recording made in your rooms, whether started by a host, started automatically, or made by going live in a webinar, ends up in the Recordings tab of your dashboard. How recordings are started is covered in How to Host a Meeting and How to Run a Webinar.
1. Open Recordings
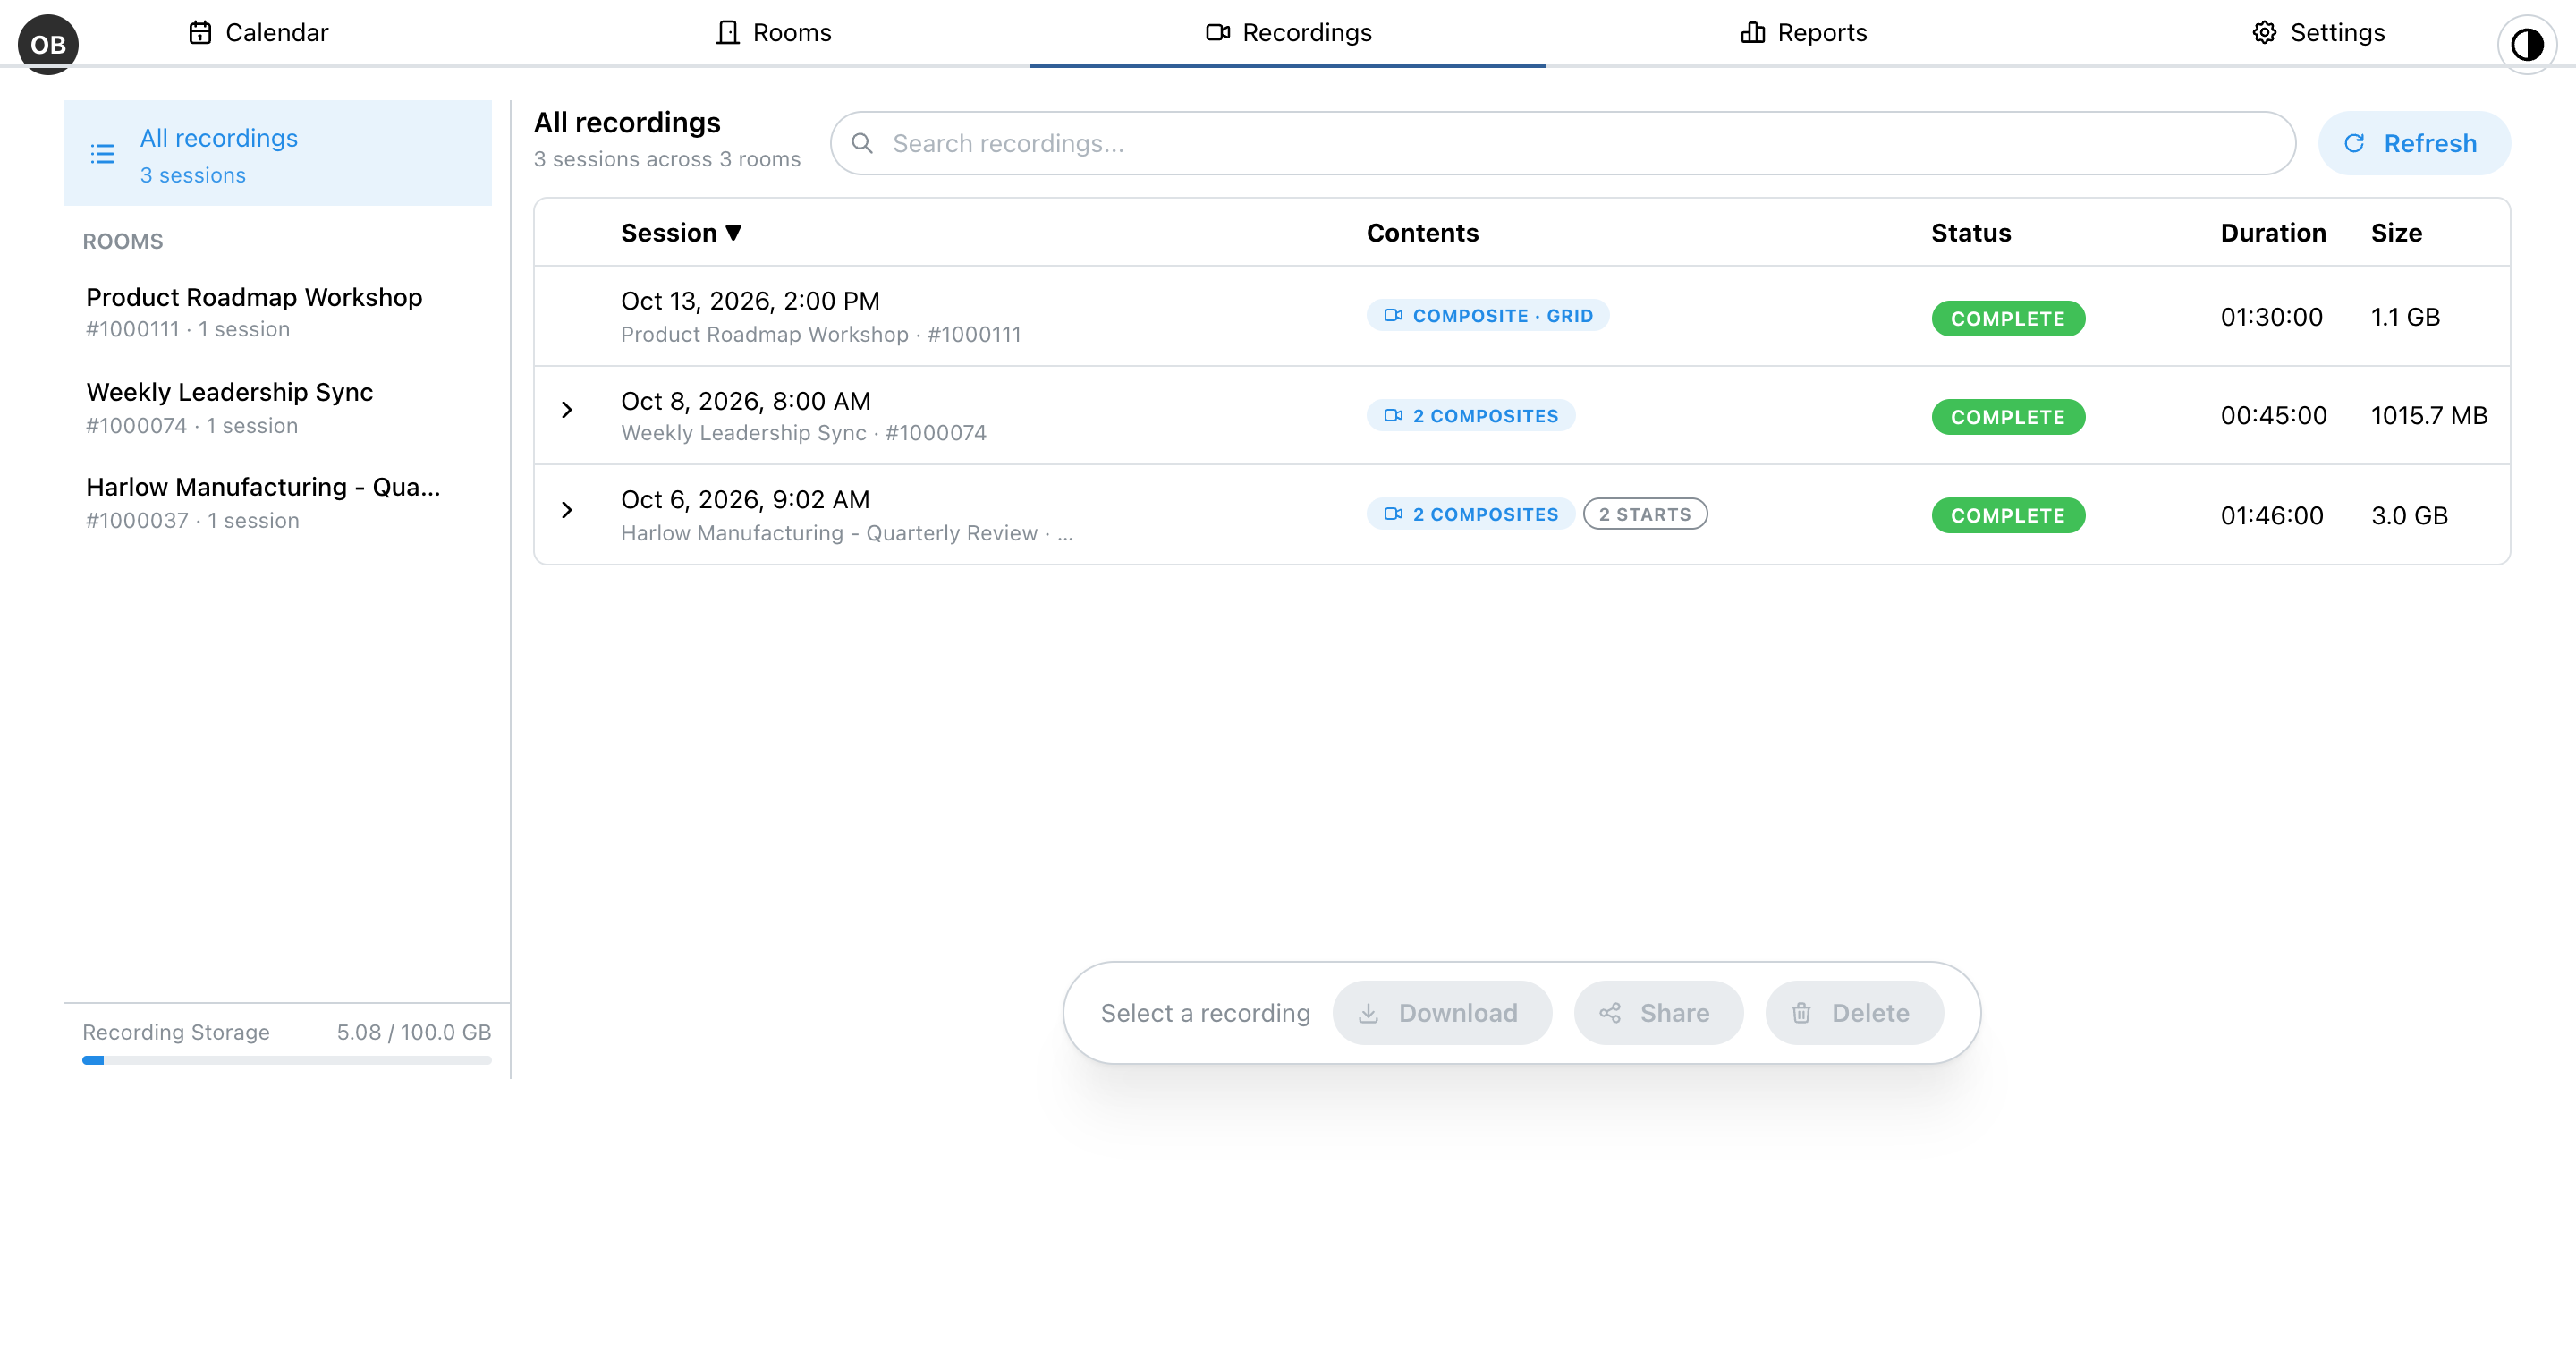
Click Recordings in the top navigation. On the left, All recordings lists everything, and below it each room is listed with its number of sessions; click a room to see only its recordings. The search box finds recordings by room name, room number or layout.
Each row is one session: everything recorded in one meeting. It shows when the session started and in which room, what was recorded (for example 2 composites, one for each layout), its status, length and size. A recording reads Processing for a short while after it stops, and Complete once it is ready.
Recording Storage, at the bottom left, shows how much of your plan's storage is in use. Enterprise includes 100 GB.
2. Open a Session
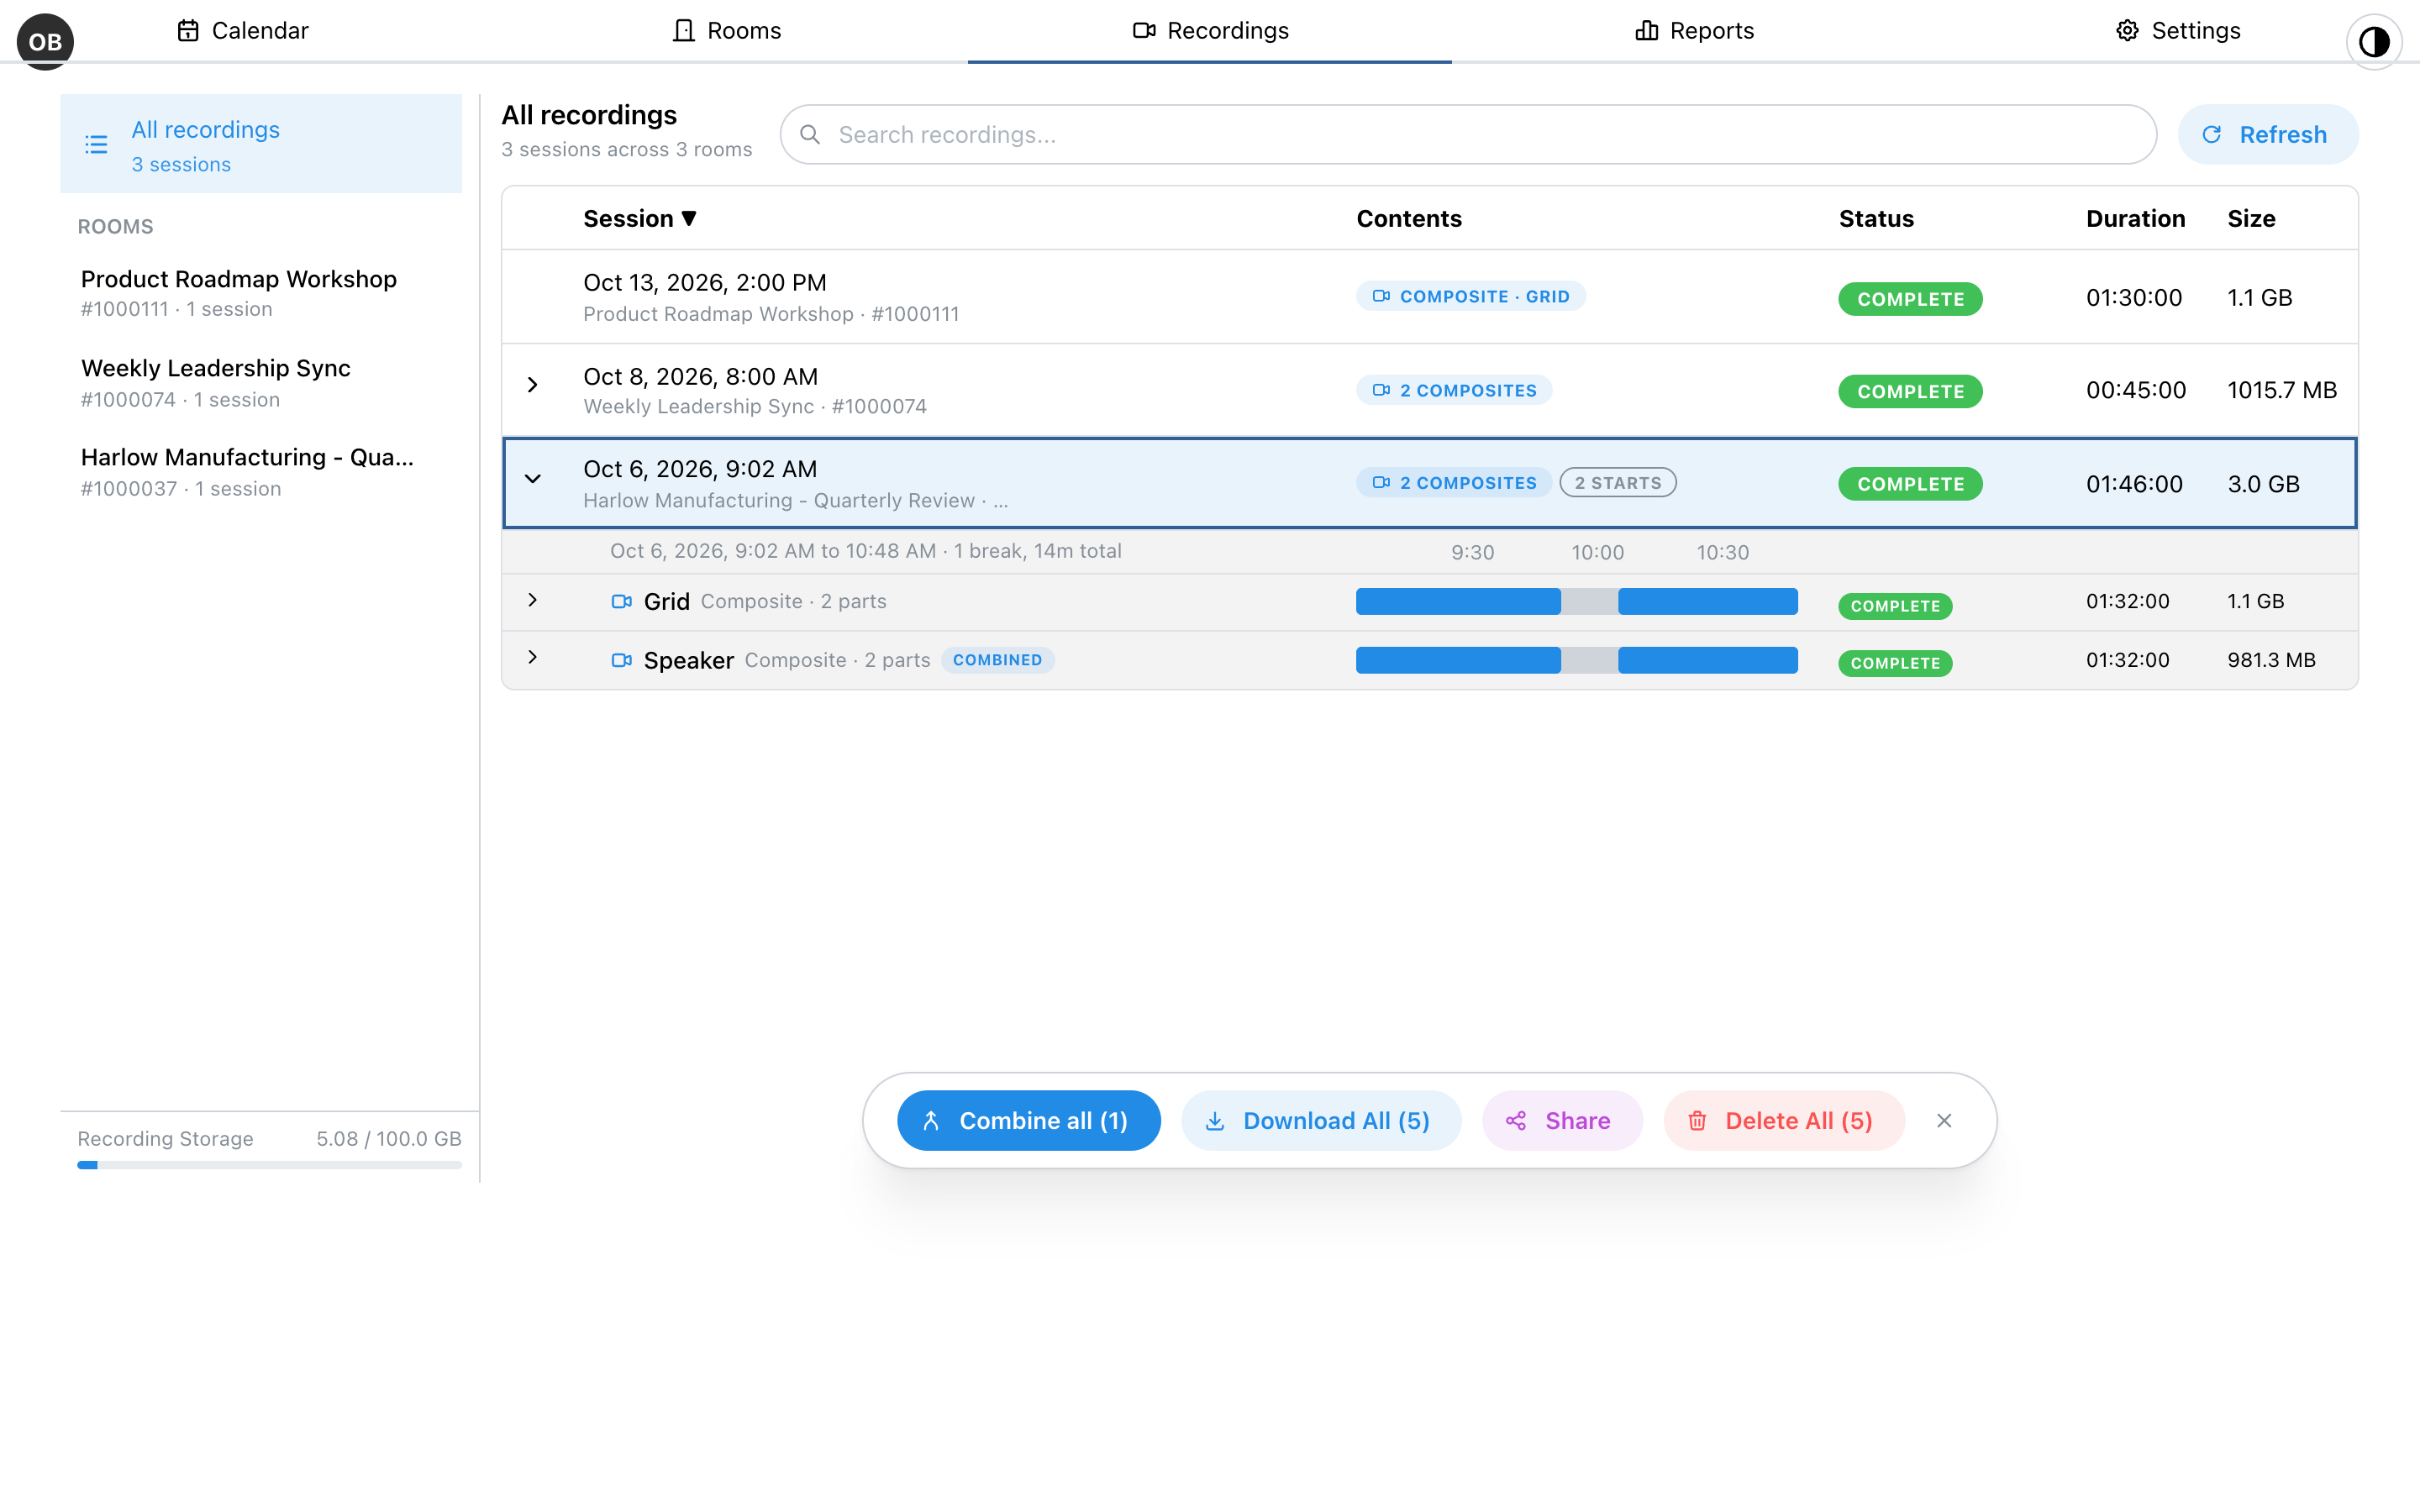
Click the arrow beside a session to open it. A line across the top shows when it was recording and any breaks (each time the recording was stopped and started again). Below it, each layout is listed with its parts, one for each stretch of recording, and Combined marks a layout whose parts have already been joined into one file. Open a layout the same way to see its individual files.
Selecting something brings up the actions for it:
- A session: Combine all, Download All, Share, and Delete All.
- A layout: Combine its parts, or Download All of them.
- A single file: Download, Share, or Delete.
3. Combine Parts into One File
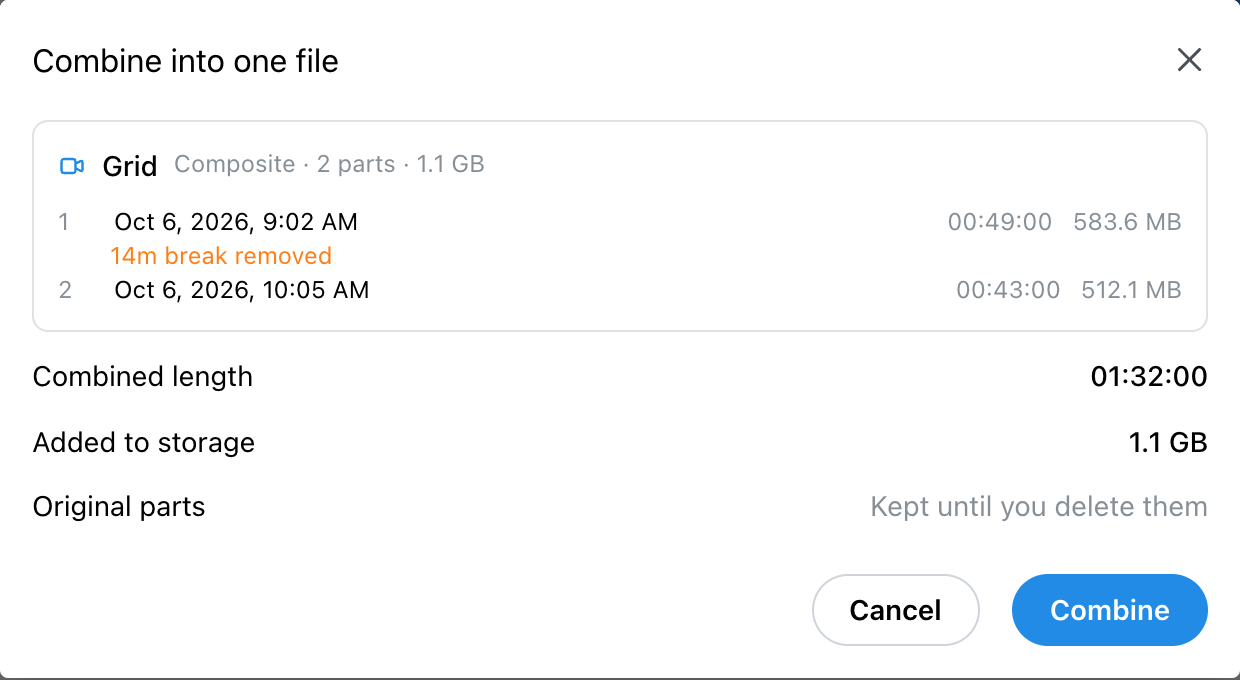
When a meeting was recorded in several stretches, select the session and click Combine all, or select one layout and click Combine. The window lists the parts in order, with the breaks that will be left out, the combined length, and how much storage the new file will use. Click Combine.
The result is a new file, marked Combined. The original parts are kept until you delete them.
4. Share a Recording with a Link
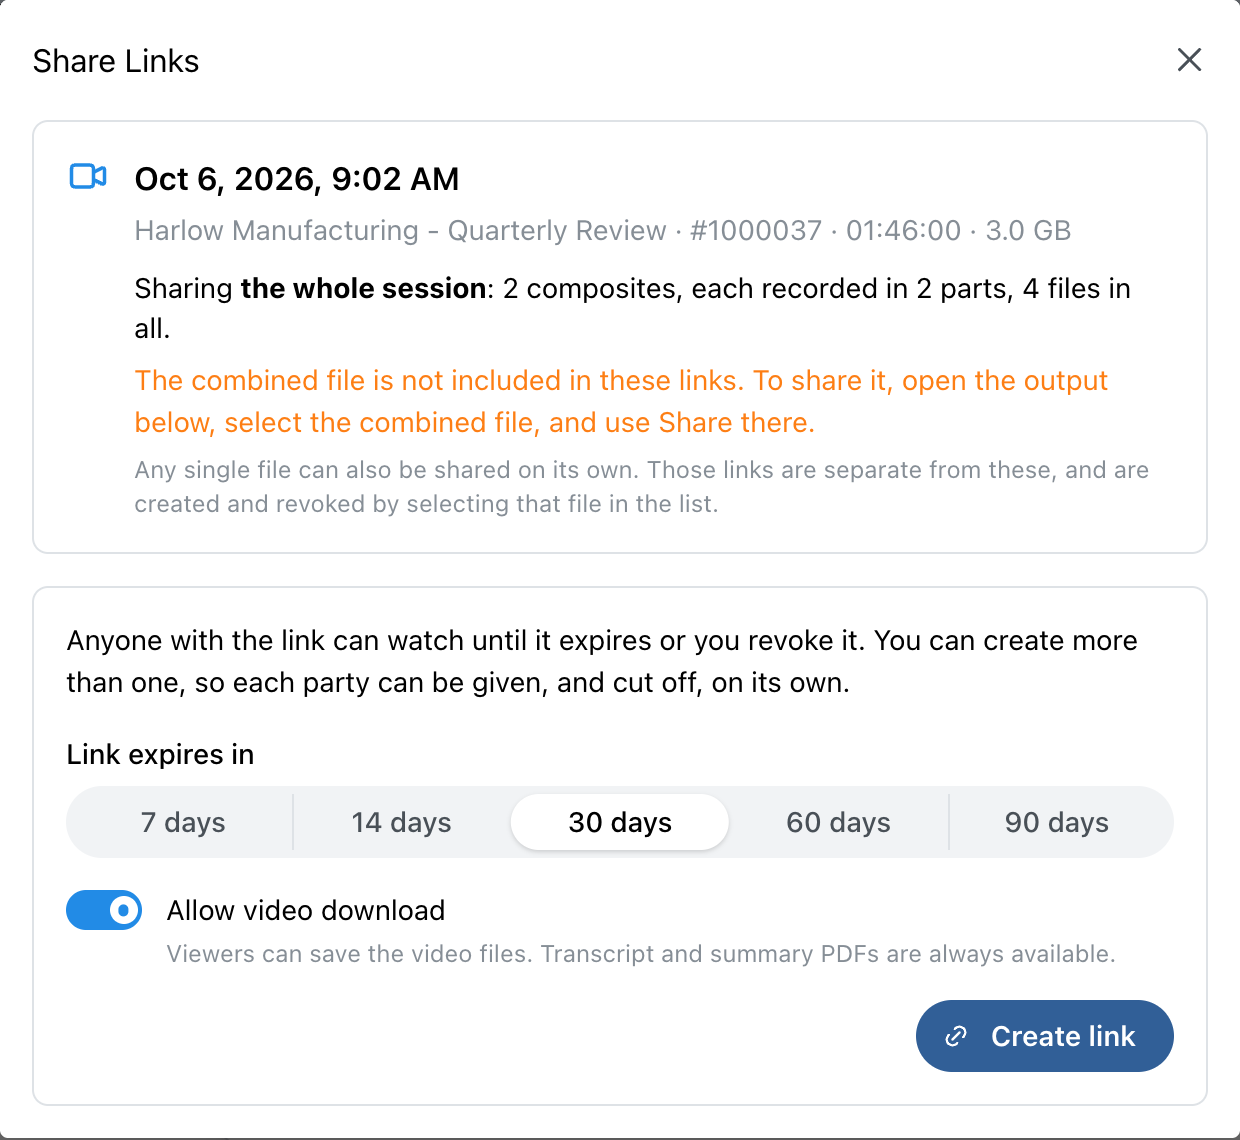
Select a session or a single file and click Share. In the Share Links window:
- Choose when the link expires: 7, 14, 30, 60 or 90 days.
- Turn Allow video download off if viewers should only watch, not save a copy.
- Click Create link and send it. Anyone with the link can watch until it expires or you revoke it.
You can create several links for the same recording, so each person or company gets their own and can be cut off on its own. Existing links are listed in the same window, where you can revoke them.
5. Download and Delete
Download saves the video file to your computer; Download All saves every file in what you selected. Delete asks you to confirm, then removes the recording for good and frees its storage.
Explore MegaMeeting